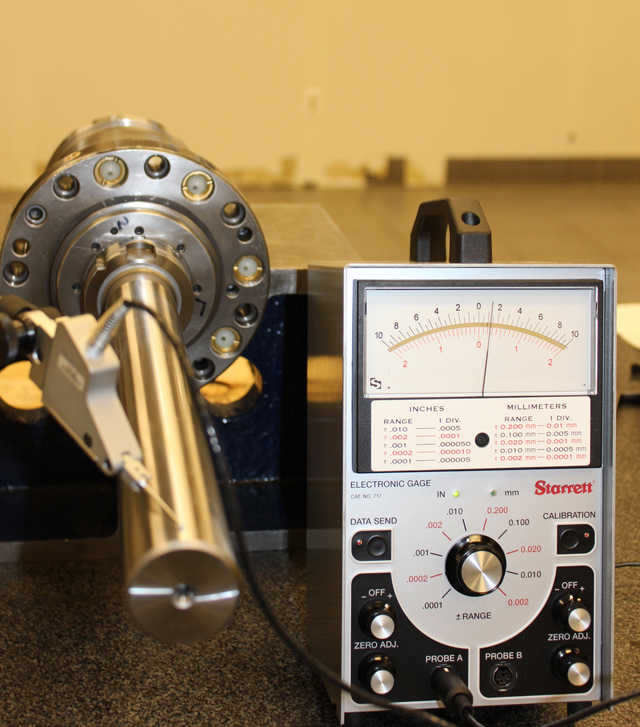
Comprehensive failure analysis and detailed documentation are indispensable tools in preventing recurring spindle failures, and can lead to improved performance.
Intensive Failure Analysis Optimizes CNC Spindle Performance and Life
Ed Sullivan for | Superior Spindle Services, LLC
When high-performance equipment such as a CNC spindle underperforms or fails, the owner of that machine can have a million dollars worth of equipment that is essentially out of business or producing substandard products. Clearly, it is critical to get the spindle repaired or replaced in order to get it back up and running – posthaste. But that is often not as simple as it might seem.
There are several components and systems related to spindles that could very well be the cause of spindle failures or contribute to them. Many of these causes can go undetected and instigate recurring failures, resulting in weeks of downtime and costly consequential damage to related equipment – unless the root cause of failure is precisely determined and reported by the spindle repair shop.
“What is really needed after a spindle is damaged, and especially after a catastrophic failure, is a detailed failure analysis report, including the data accumulated thorough comprehensive inspection and testing,” says David Kirkpatrick, president of Superior Spindle Service (Taylor, MI), a company that specializes in repairing and remanufacturing machine tool spindles. “Unfortunately, not every repair shop can provide that,” he adds.

Kirkpatrick says that a comprehensive failure analysis report should clearly show when the real cause of failure is not the spindle itself, but something related to the motor, bearings, gages or even improper spindle mounting.
Generally speaking, failure analysis amounts to the process of collecting and analyzing data to help determine the true cause(s) of a failure. The goal of this is, of course, to recommend corrective actions that will help avoid future failures.
“It is often assumed that failure analysis is an intensive, complete process, as it should be,” says Kirkpatrick. “Yet, when applied to a CNC spindle, to be truly comprehensive, the failure analysis process has to extend to all equipment that interacts with a spindle. For instance, our technicians have discovered things like faulty lubrication lines and control issues that would actuate the draw bar and encoder issues.”
Kirkpatrick says these problems were all solvable, but it was necessary to work with the machine shop customers to identify each issue and correct each one of them.
The critical report
The critical phase of an in-depth failure analysis process is the report that documents findings and includes recommendations for corrective actions.
Kirkpatrick recommends an intensive program that encompasses not only attention to the spindle, but also motors, bearings, air purge and other associated components. His company treats failure analysis as a primary service function.
“During the tear down procedure, every part is inspected to identify why and how the spindle failed,” Kirkpatrick explains.“ Once the equipment has been thoroughly cleaned, every part of the spindle’s geometry is examined, referencing OEM standards for dimensions and concentricity. Every step of this process is photographed and documented, and included with all findings in a comprehensive failure analysis report, along with specific recommendations on how similar failures can be avoided and spindle life can be extended.”
In some cases, particularly when it appears that customers might be perplexed by failure analysis reports that indicate complex root causes of failures, it is advisable for the spindle repair shop to provide another level of validation, via the component manufacturer or supplier.
“In such instances, it’s advisable to reach out to OEM resources – the bearing suppliers, for example – to provide another level of failure analysis,” says Kirkpatrick. “Suppliers that provide tooling draw bar systems and other third-party experts can also be called upon complement the failure analysis effort by substantiating report findings as they pertains to their products.”
On-site analysis
When customers experience repeated failures, Kirkpatrick advises that spindle services visit the customer’s production line to get a firsthand view of the CNC center on which the spindle is running. When technicians perform on-site inspection, problems not pertaining specifically to the spindle itself may be discovered.
For example, one of Superior Spindle Service’s major automotive customers was experiencing repeated failures which had caused considerable downtime as well as over $120,000 in spindle service costs.
“Each time we inspected one of the customer’s wrecked spindles, we determined that the most likely cause was a bearing problem related to a malfunction of the spindle’s air supply,” Kirkpatrick explains. “Although we suggested in each failure analysis report that the customer re-check the air supply, each time they checked it, the air supply seemed fine. So, our technician inspected the air supply pressure gage and found that the gage needle was stuck, and that the air wasn’t actually turned on. So, we installed a new gage, and the customer hasn’t experienced a spindle problem for over two years.”
Other on-site visits have revealed setup and alignment problems, improper spindle mounting, and motor-related problems, and controller malfunctions.
Extending spindle life
Kirkpatrick is convinced that intensive failure analysis can lead to extended spindle service life. For example, when customers are working with softer metals decreasing Spindle RPM and Increasing Feed Rates can increase Spindle Life with no impact on Cycle Times.
In another instance, one of his customers was chronically burning bearings due to running a spindle continuously at high speed. So, the spindle technician recommended a different bearing setup, and the spindle service life improved dramatically.
Superior Spindle Service feels so strongly that spindle life can often be improved through proper failure analysis that the company has an inspection center that is dedicated to spindle motor electronics. This includes motor mega-ohm value, thermistor value, encoders, motor proximity sensors, and analog sensors.
“We not only bench check the motor, but also confirm that it communicates accurately with whatever type of machine controller the customer has installed at their CNC machine,” says Mike Davis, who manages the center. “During this process we also determine motor life expectancy, and can predict the failure mode. This enables us to suggest that the customer have the motor rewound or baked, in order to avoid potential failures.”
Optimizing performance
Kirkpatrick believes that, when a spindle is underperforming in a specific application, it is possible to improve on performance through spindle design modifications such as spindle metallurgy or shape.
For example, through the use of air gaging equipment, Superior Spindle Service is capable of detecting when a customer’s spindle taper is out of OEM spec, and can help return the taper to the proper spec within 50 millionths of an inch. However, if a somewhat modified taper will improve performance for the customer’s specific application, the air gage equipment can precisely verify the geometry of that modification as well.
For more information, contact Superior Spindle Services, LLC; 25377 Brest Road, Taylor, MI 48180; Phone: toll-free (877) 946-7400, (734) 946-4646; Fax (734) 946-4851; E-mail: dkirkpatrick@superiorspindle.com; or visit the web site www.superiorspindle.com.
The content & opinions in this article are the author’s and do not necessarily represent the views of ManufacturingTomorrow
Featured Product

