Exact Metrology Provides Updates on PolyWorks Inspectorâ„¢ and Hexagon Romer
A new feature in the PolyWorks Inspectorâ„¢ is multi-piece editing. Users can now make changes in one piece that can be propagated to other pieces. If a user has multiple pieces, they can make changes like creating, editing features, alignments, reporting items, etc.
Exact Metrology, a comprehensive metrology service provider, recently published informational videos on PolyWorks Inspectorâ„¢ and Hexagon Romer Absolute Arm on the company's YouTube channel at https://www.youtube.com/user/ExactMetrology/videos.
A new feature in the PolyWorks Inspectorâ„¢ is multi-piece editing. Users can now make changes in one piece that can be propagated to other pieces. If a user has multiple pieces, they can make changes like creating, editing features, alignments, reporting items, etc. Then, these changes can be transmitted to past and future pieces/templates, create custom propagations or just apply the changes to the current piece. After choosing the propagate option, the user sees the changes in the other pieces and/or templates including report(s) or report items.
Another update of PolyWorks Inspectorâ„¢ pertains to augmented GD&T. Center point features can now be reported with more capabilities. These include circularity, flatness, perpendicularity, etc. Users can also see MIN/MAX deviations and can view the color arrow deviation tags.
An online tutorial shows how to make sure the Hexagon Romer Absolute Arm is still in calibration. First, the bar artifact needs to be placed correctly to scan it. The ideal location is centered with the main axis of the arm at a distance away where it will be just below the elbow when the arm is extended out. To secure the bar, use pre-drilled tapped holes. They accept simple machinist fixturing to hold it in place. C-clamps can also be used to secure the bar to a rigid table. When doing a length checkout, only the 15 mm master probe should be used. Next, the user needs to open RDS Data Collector. Used with Hexagon Romer Absolute Arm, the software allows the operator to check the accuracy of the arm and probes and calibrate/align the probes and scanner as necessary. To start probing, move the probe to the first position. The probe needs to be properly seated in the conical feature at each end of the bar. Following the prompts in RDS, move the probe to the end conical features and pull the trigger to record a point. Once ten positions have been recorded, RDS will display the results. The MIN/MAX values should be below the standard values for the type of arm being used.
Exact Metrology is ISO, AS9100 Certified as well as FFL and ITAR Registered.
Exact Metrology, with facilities in Cincinnati, Ohio, Moline, Illinois and Milwaukee, Wisconsin, plus affiliated offices throughout the country, is a comprehensive metrology services provider, offering customers 3D and CT scanning, reverse engineering, quality inspection, product development and 2D drawings. The company also provides turnkey metrology solutions, including equipment sales and lease/rental arrangements.
Featured Product

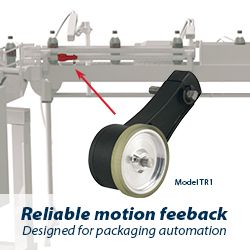
Model TR1 Tru-Trac
The Model TR1 Tru-Trac® linear measurement solution is a versatile option for tracking velocity, position, or distance over a wide variety of surfaces. An integrated encoder, measuring wheel, and spring-loaded torsion arm in one, compact unit, the Model TR1 is easy to install. The spring-loaded torsion arm offers adjustable torsion load, allowing the Model TR1 to be mounted in almost any orientation - even upside-down. The threaded shaft on the pivot axis is field reversible, providing mounting access from either side. With operating speeds up to 3000 feet per minute, a wide variety of configuration options - including multiple wheel material options - and a housing made from a durable, conductive composite material that minimizes static buildup, the Model TR1 Tru-Trac® is the ideal solution for countless applications.
