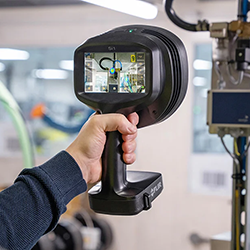
CAPTURE 3D Enables Fast Digitalization of Extra-Large Objects with the ZEISS ATOS LRX
The new ZEISS ATOS LRX is a large-volume 3D scanning sensor with an ultra-bright laser light source that captures up to 2 × 12 million coordinate points with one scan, quickly delivering precise, full-field data from very large parts. With this development, industries like heavy casting, shipbuilding, aerospace, automotive and wind energy can now measure very large parts quickly and efficiently.
CAPTURE 3D, a ZEISS company and the leading provider of innovative 3D digitizing solutions in the U.S., today announced the ZEISS ATOS LRX—a new large-volume 3D scanning sensor with an ultra-bright laser light source that captures up to 2 × 12 million coordinate points with one scan, quickly delivering precise, full-field data from very large parts. With a measuring area of up to four square meters, the ZEISS ATOS LRX is ideal for applications such as aerospace structural components like fuselage, wings, wing ribs, and tail, MRO, automotive design, tool making, and crash testing, machine building, marine propellers, rotor blades and molds, and wind turbine housings.
The ZEISS ATOS LRX is a complete solution for applications requiring rapid, high-quality 3D data and large-volume measurement beyond what conventional fringe projection systems, laser trackers, and laser radars provide. By delivering large-volume digitalization quickly, the ZEISS ATOS LRX closes a gap in the metrology industry not yet met by current technology. Designed for industrial applications, the ZEISS ATOS LRX includes robust sensor housing to protect against dust and water splash allowing it to work reliably and precisely even in harsh production environments. With this development, industries like heavy casting, shipbuilding, aerospace, automotive and wind energy can now measure very large parts quickly and efficiently.
Next Generation Laser Light Source
The ZEISS ATOS LRX draws upon proven ATOS 5X technology by utilizing an extremely bright blue laser light source generated by an advanced integrated laser light compressor, creating a uniform, non-coherent, speckle-free light resistant to ambient light conditions. The light projects over a measuring area spanning 2000 x 1600 mm for short exposure times, even for dark or shiny surfaces. Like existing sensors in the ATOS 5 lineup of blue light 3D scanners, the ZEISS ATOS LRX quickly captures high-resolution data with precision and detail, including complex geometrics and freeform surfaces.
Dynamic Radar-Based Operator Safety
The ZEISS ATOS LRX utilizes a class 2 laser for maximum operator safety. An integrated sensor uses radar to monitor the safety distance to the user, automatically reducing the luminous intensity as necessary if the distance is not maintained or if it detects movement in the critical area. The safe laser protection class 2 allows the 3D scanner to operate without further protective measures. The projector light can also be reduced to utilize interactive features such as a touch probe, live tracking and back projection.
Fast On-Site Recalibration with HyperScale
The ZEISS ATOS LRX features the new HyperScale software function designed for fast on-site calibration and the compensation of undesired effects of temperature changes. A calibration cross CC50/2000 that remains folded together for easy setup is included. A single measurement of a DAkkS-certified length standard completes sensor calibration, and the sensor self-monitors its calibration status throughout scanning.
Single Software Solution
Users complete scanning, inspection, and reporting in the ZEISS ATOS LRX software within GOM Inspect Pro, a part of the ZEISS Quality Suite. The software supports 3D scanning and inspection processes by providing detailed analyses and reporting functions. Users can control the sensor by computer or remote control.
For more information or to see a demonstration of the ZEISS ATOS LRX, visit: www.capture3d.com
About CAPTURE 3D
CAPTURE 3D, a ZEISS company, is the leading provider of innovative 3D measurement solutions in the United States, helping companies solve engineering challenges, save time, minimize costs, and improve their overall time to market strategy. As the official U.S. distributor for Carl Zeiss GOM Metrology GmbH /ZEISS IQS North America, CAPTURE 3D combines vast industry expertise with robust technology to change the way people think about and experience measurement.
Comments (0)
This post does not have any comments. Be the first to leave a comment below.
Featured Product

