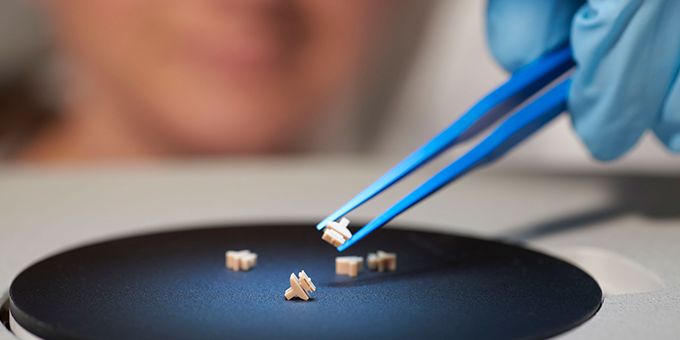
But there is one aspect of a micro molding project that is often overlooked, especially when customers are assessing the in-house capabilities of a micro molding partner, and that is validation and quality control.
 Validation & Quality Control: Optimizing Micro Molding Outcomes

Aaron Johnson, VP Marketing & Customer Strategy | Accumold
You will have heard it discussed on many occasions that specialist micro molders need to be vertically integrated in order to optimize outcomes for customers. Of the various stages involved in taking a product design to volume micro manufacturing, some of the steps that should be accessible under the one roof are obvious. Design and material experts need to be on hand, micro tooling must be undertaken in-house, so too micro molding (obviously) and automated assembly.
But there is one aspect of a micro molding project that is often overlooked, especially when customers are assessing the in-house capabilities of a micro molding partner, and that is validation and quality control. You will no doubt have heard the phrase, ”if you cannot measure it you cannot make it,” and in the area of micro manufacturing this is fundamental, as when assessing the conformity to design of parts often difficult to even see with the naked eye, an understanding of the importance of validation and measurement is vital. So is its role in a modern micro molding project as an enabling technology, allowing us to rise to even greater miniaturisation challenges and push the boundaries of innovation in product development.
Measurement development time, and Gage R&R are vital and extremely valuable when undertaking a micro molding project, and micro molders should work closely with their customers on model and print interpretation and Design for Micro Molding (DfMM) — during the product development process.
The measurement processes must be assessed and validated as the molding process is qualified. Very often, with measurement taking this central role, it moves from a being seen as a necessary evil to a set of technologies that can help improve designs, re-dimension prints, and better use Geometric Dimensioning & Tolerancing (GD&T) so that the part design is easier to mold, easier to measure, and performs better for the end user.
As so often in product development of micro plastic parts, it is the influence of all departments early in the design stage that leads to optimal outcomes, and an interrogation of your chosen micro molder’s view of metrology and its central role in manufacturing success should be prominent in any discussions before embarking on your project.
WHERE TO UNDERTAKE MEANINGFUL MEASUREMENTS
When looking at advanced manufacturing settings, there is a balance between the use of metrology in the lab and its use in-situ in the production facility. A key driver in all scenarios is to get meaningful data as quickly as possible, and that this data allows you to make decisions that help to optimise results.
The first step is to assess the metrology requirements for a specific application in terms of the number of critical features/dimensions, tolerance requirements, part geometry, measurement systems available (lab and in-process), estimated part volume/run rate, cost of parts, and potential for scrap if measurements are delayed. With some projects it is important to work with a customer to identify critical features/dimensions, develop a measurement process on a OGP machine, prove the measurement method utilizing a fixture and programs as repeatable and reproducible, buy duplicate OGP machines and deploy the machines, fixture, and programs and trained production personnel to operate the machines and collect data in the production room.
Accumold prefers to perform measurements as close to production (in-process) as practical with a metrology system that is repeatable and reproducible. However, sometimes project details require measurements to be done in a lab environment, and when these are required it is important to establish processes for part handling and delivery, prioritization of part measurements, measurement method, data collection, and reporting of results to production. All metrology requirements are included in part specific control plans.
CONFRONTING THE CHALLENGES
Undertaking measurements in a micro molding project throws up numerous challenges, not least the part size which can be extremely small, part fixturing (for in-lab validation), print tolerances, and surface roughness.
The part size is the constant battle, and with parts as small as the ones we routinely micro mold at Accumold, the only viable metrology tools are non-contact, typically using a light source to measure instead of a physical probe. We overcome fixturing problems by building plastic or steel custom fixtures which allow the measurement of all the relevant features on a particular part
Surface roughness is another critical metrology challenge because of the small size and critical finish requirements. Non-contact metrology tools are vital for such applications, tactile tools having the potential to compromise surface integrity.
With all these considerations in mind, and to cater for the plethora of in-lab and in-process measurements required, Accumold uses several non-contact metrology methods including camera, laser, and white light interferometry. Interferometers are especially useful for the measurement of fine details including Z heights, 3D surface finish, and lens dimensions. In addition, we sometimes use laser, vision, and white light measurement techniques on a single part based on the part size, feature size, surface finish requirements, and tolerance limits. We are routinely measuring parts with tolerances less than 10 microns.
STIMULATING INNOVATION
Choosing a micro molder with an extensive suite of best-in-class metrology options and the expertise to use them effectively is not just important in terms of the securing of relevant data and therefore having the tools to optimise manufacturing outcomes. When used properly, metrology tools provide invaluable insight concerning the demanding micro size tooling and parts required to meet customer needs. Metrology equipment and skills are used to measure steel details in the mold, part features/dimensions to ensure the parts meet print tolerance, and to ensure we have a capable process. Intense design of experiments, stress runs, operational qualification and production qualification runs are undertaken to assess dimensional capability to our internal or customer Cp, Cpk, Pp and Ppk requirements to values of 1.0, 1.33 and 1.67 as required for the project. Using the metrology equipment and expertise in house at Accumold, we can provide data and immediate feedback that help determine if steel in the mold is acceptable or if adjustments are required.
Metrology technology is constantly evolving and it is important to actively assess new technology. The expertise and experience in our design, mold and automation build, production/process, and quality assurance personnel is critical to success.
CONCLUSION
The central role of metrology in a vertically integrated micro molding company is obvious and central to overall product development success. Metrology is now a powerful enabling technology, and has a key role to play in the timely and cost-effective production of often exacting end-use parts and components. As such, it is important before partnering with a micro molding expert to ensure that you discuss what metrology capabilities are available, to make sure that they are available in-house, and to re-assure yourself that your chosen micro molding partner has the experience to develop validation and measurement processes that result in the creation of successful and innovative end-use products.
About Dave O’Leary
Dave O’Leary is the Quality Director at Accumold. The company has grown to a 130,000 square foot fortified facility designed for assurance of supply, employs over 350 staff, and is a net exporter shipping all over the world every day from its Ankeny, IA, USA facility which runs 24 hours a day, 7 days a week.
The content & opinions in this article are the author’s and do not necessarily represent the views of ManufacturingTomorrow
Featured Product

