Over recent years, a wide range of advanced machine tools have been developed to help satisfy global aerospace manufacturing industry’s requirement to produce parts faster than ever before.
 Providing Precision to Power Aerospace Engines

Case Study from | Mitutoyo (UK) Ltd
Although these innovative machines manufacture complex components within much faster cycle times, often increased production levels create bottlenecks in inspection departments. To help avoid these hold-ups, increasingly progressive aerospace manufacturers are including state-of-the-art inspection technology in their investment plans.
Having selected the most appropriate machine tools to enable the efficient production of blisks and IBRs (aero-engine components consisting of a rotor disk and blades), the management of ITP Engines Ltd. recognized the need to invest in advanced quality control equipment. The proposed inspection system needed to be capable of accommodating the demanding dimensional tolerances of the company’s blisks and IBRs, and also have the required high-speed, high-accuracy scanning capabilities that could keep pace with increased production.
Rafael Castro, ITP’s advanced’s manufacturing facility factory manager explained, “As ITP Engines is a leading global company that delivers high-technology products and services in the aeronautical and industrial engine market, product quality is all important to us. Although our search for an innovative, faster inspection system was prompted by the need for our inspection provision to keep up with our increased output, we also realized that our planned purchase represented an ideal opportunity to further enhance our precision capability and also to increase the amount of data captured for analysis.
“In addition to other metrology technologies, we considered non-contact optical systems, although the physical nature of our blisks and IBRs and the potential for reflections from the materials we use, meant that this technology was not suitable for our needs,” Castro continues. “We also looked at several alternative conventional CNC coordinate measuring machines that had scanning capabilities. Some CMM providers could deliver certain aspects of our requirements, and others had potentially suitable systems in development. The only CMM manufacturer who offered a total working package that could meet our demanding criteria was Mitutoyo. After an impressive demonstration, we were happy to place an order.
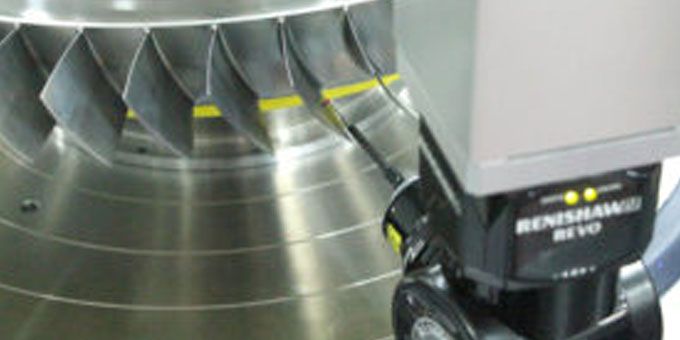
To meet ITP Engine’s measuring requirements, Mitutoyo proposed an advanced Crysta-Apex C CNC coordinate measuring machine fitted with a Renishaw Revo measuring head and a high-precision Rotary Precision Instruments (RPI) rotary table to provide a fourth axis. In addition, the company suggested the use of Mitutoyo MCOSMOS and MAFIS Express software.
“Although Mitutoyo’s recommended combination of a high-accuracy CNC CMM, a Revo measuring head, a rotary table and relevant software was able to provide excellent results, Mitutoyo’s technical staff were happy to work with ITP Engines to further develop and integrated the system’s various elements to ensure the delivery of a package that was ideal for our needs,” explained Castro.
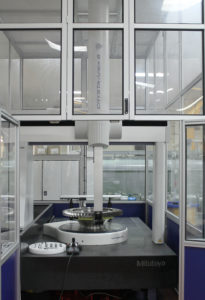
Mitutoyo’s answer to ITP Engines’ inspection needs is based on an advanced Crysta-Apex C coordinate measuring machine that was designed and constructed using all Mitutoyo’s vast experience in CNC CMM technology. The machine is built using lightweight materials and has an innovative moving-bridge type machine structure, providing excellent motion stability and high accuracy. In addition, the Crysta-Apex C has a temperature correction function that enables the accurate measurement of parts under shop-floor conditions.

Rather than using a conventional probing system, the Mitutoyo CMM was fitted with a Renishaw REVO, five-axis measuring head that is able to perform continuous surface scanning to deliver full 3D geometry in a single scan. The state-of-the-art REVO head is able to overcome the limitations of three-axis scanning methods. REVO uses synchronized head and machine motion when scanning, rapidly following changes in part geometry without introducing dynamic errors. The CMM is able to move at a constant velocity while measurements are being taken, without impacting accuracy.
Further enhancing the speed and accuracy of Mitutoyo’s integrated solution, when being measured ITP Engine blisks and IBRs are held securely and maneuvered on a high precision RPI rotary table that was specifically designed as a fourth axis for use on high-accuracy coordinate measuring machines.
As the Crysta-Apex C CMM is located on ITP Engines’ shop floor, close to a production cell, the CMM was installed in a dedicated enclosure and is isolated, by the use of specialized dampers, from the possibility of vibrations transmitted from the company’s machine tools.
Rafael Castro continues, “Customer requirements demand that all airfoils on all blisk and IBR components are measured. An average part has about 60 airfoils and each airfoil needs to be measured in at least six sections, each one with around 200 points. With a future production greater than 1,000 blisks and IBRs a year, optimization of our inspection process was vital.
“The Revo scanning head on our Mitutoyo CMM features continuous surface scanning, capturing full 3D geometry in a single scan, which is a major improvement when compared to the traditional technology of intermittent single-point touches. In addition, the use of a high-precision rotary table allows us to use a smaller and more precise Mitutoyo CMM.
“As the increased amount of points we are now scanning had the potential to make post processing more time consuming, a software tool was developed by the ITP UK´s controls team in Whetstone to reduce data analysis time,” says Castro. “Now fully operational our new method is up to six times faster than our previously used conventional system. In addition, our Mitutoyo CMM system has further enhanced our already impressive accuracy capability and provided us with much improved measurement data.
“CMM inspection has taken a step forward in the ITP Group,” concludes Castro. “All of the new generation blisks and IBRs can now be measured using this new method. Our next step will be to extend our advanced new scanning technique to each of our remaining complex parts.”
If you like this article you may like "Advanced Metrology Tools Enable Reliable Engine Light-Weighting"
The content & opinions in this article are the author’s and do not necessarily represent the views of ManufacturingTomorrow
Comments (0)
This post does not have any comments. Be the first to leave a comment below.
Featured Product

