AUTOMATED POST PROCESSING SOLUTIONS: PROS & CONS
At 3DPRINTUK we specialise in polymer powder bed fusion (PBF) 3D printing technologies and high volumes of parts, notably offering batch production services. We currently produce more than 1 million parts a year, with capacity and volume of parts continuing to increase steadily.
Post processing is a very important part of our service, but as volumes have increased, we have had to source the best available solutions to meet our needs and the ability to deliver for our clients. This has meant focussing on automated post processing systems. As a result, we have invested in a full suite of Dyemansion machines including both primary and secondary post processing processes. Currently, we operate 2 Powershot C machines, 2 Powershot S machines and 3 DM 60 Dyers, along with a number of vibro polishing machines from Sharmic Engineering.
This article testifies to our experience with this range of automated post processing solutions as openly and honestly as we can. We are not focused on alternative customised post processing processes, including painting, post machining or electroplating. Nor are we focused on assembly — which arguably is also considered “post processing”.
We break these automated post processes down in to two sub-sections: primary (necessary) processes and secondary (optional) processes.
PRIMARY POST PROCESSES
For any PBF 3D printed parts removing powder and cleaning the parts is essential. There are various methods available here, including but not limited to air blasting, water jet blasting, dry ice, and bead blasting.
Primary post-processing steps are provided as standard as part of the 3DPRINTUK service. We have invested heavily in automating this process, specifically using Powershot C machines from Dyemansion, and we will continue to extend our capacity as demand increases. Essentially this kit comprises a high-level sand blaster crossed with a washing machine barrel that can process up to 5 kg of parts per cycle. This process provides a “natural finish” — the way we have always described this finish is like an extra strong mint, a slightly powdery texture. It is important to understand, though, that straight from the machine, the parts are covered in powder about 3-4 mm deep, and it’s pretty stubborn. This machine will remove the powder, to leave the parts with a natural matte finish.
Pros. This is a fast and simple process. To provide context, we used to complete this process manually, using an air gun and compressed air to remove powder from each part individually. On average, it would take about an hour and a half for every build. By comparison, the Powershot C will clean a whole build in 8 minutes. Although other post processes have negligible impact on the dimensions, the Powershot C provides the most true-to-print dimensions. It is important here to highlight “print dimensions” as opposed to STL dimensions. The tolerance for any print is generally 0.3%, although at 3DPRINTUK we regularly achieve better, so any part cleaned on the Powershot C is closest to the part that came out of the printer. In addition, sharp edges and threads are crispest from this process.
Cons. Relative to injection moulding, parts that are only cleaned, with no secondary post processing, have the roughest finish. As noted above, the natural finish is powdery in texture – a matte finish, so to speak. As a result, this type of finish will inherently pick up finger marks, which is an issue for parts that are handled frequently. Parts with holes / channels can require additional cleaning. To avoid this we recommend a minimum diameter of 3 mm for these types of feature. This cleaning process can affect the quality of any secondary dying process because of the nature of the process itself, whereby the bead blasting media is glass, and tiny fragments of glass can become embedded in the surface of a part. The glass fragments are so small they can’t be seen or felt, but glass does not dye. This means the parts may show inconsistencies if dyed.
SECONDARY POST PROCESSES
There are a number of reasons to apply optional post processing to parts, including but not limited to advantages gained in terms of aesthetics, part performance,e and improved material properties.
VIBRO POLISHING. At 3DPRINTUK we operate two automated Sharmic round vibratory machines. These systems feature a giant 1.4 m diameter vibrating bowl, which is filled with ceramic chips that abrase and compress the outer surfaces of the parts. It should be noted that the size, shape and material of the chips can affect times and outcomes. We use larger, cone shaped ceramic chips as we have found these produce the best overall results with 3D printed parts.
Pros. This process provides a very smooth finish compared with the natural finish described above. The comparison here is intentionally made with the natural finish – and therefore it is important to understand that it is not a gloss finish comparable with injection moulding. To continue the mint analogy, we would describe this finish as more like a Mentos / Softmint. It is a relatively fast process. We have identified a 2-hour cycle for optimized output and turnaround. Two hours results in a really decent polish. One hour can produce okay results, and there is very little difference between parts that come out after 2 hours even up to 8 hours. The machines can process large volumes of parts per cycle, typically up to 1000 parts per 2-hour cycle. It is a very cost-effective process, particularly in terms of price-per-part for high volumes. 2 hours divided by 1000 parts is only seconds per part. It is also relatively cheap to run this process, the ceramic chips wear down at a very slow rate and the only additional utility requirement to the power is water, which runs through the machine to remove any excess powder.
Cons. Damage is highly likely on thin and very small part features. To mitigate this risk, we set limits of 2 mm minimum thickness in all directions for parts that require polishing. Many of our customers choose to go below this limit at their own risk, and most of the time, they polish fine. However, we cannot guarantee parts with tapered edges or unsupported walls will not get damaged below 2mm. Vibro polishing can result in the filleting of sharp edges. Parts with angles of 90˚ can lose a few tenths of a mm from their apex. For most applications this is acceptable, but you should be aware that parts can lose perfectly straight edges with this process. An extremely small amount of material is lost in the process from the general surface of the parts – well below 100 microns. This is much less than the ±0.3mm accuracy of the machine so can be considered as negligible and should not be accounted for in the design of the part. Another common problem is that the polishing chips can get stuck inside holes — literally any hole they can find. These machines are very loud. If you are using a 3D printing service then that’s our problem. But for anyone looking to bring operations in house — don’t underestimate this. They need their own space.
SHOT PEENING. Cleaned parts are post processed by blasting plastic media at high speed onto the surface of the part, to improve the surface finish. This results in a semi-gloss or textured gloss sheen to the part, and is personally my favourite finish as well as the best value for money. The shot peening process is similar in nature to the cleaning process described above, and actually the kit is similar. The automated shot peening systems (Dyemansion Powershot S) that we use employ two nozzles that shoot out polymer beads into the rotating drum containing the parts under high pressure. Where the process differs from the cleaning process, however, is the polymer media and, significantly, the operating pressure — it operates at a considerably higher pressure for shot peening. So, for cleaning you are talking 2-3 bar, while for shot peening the pressure is 5-6 bar.
Pros. This is a super-fast process — 15 mins per batch of parts rather than 2 hours, although to be fair the batches are smaller. Superior smooth look and finish compared with polishing. This is especially significant for parts that are going to be dyed or painted. No chemicals are involved in this process – it is just air and plastic beads being blasted.
Cons. The only real problem with this process is that the beads, which are approximately 0.5 mm in diameter, do get stuck in narrow gaps and channels of parts. This includes any text or logos printed on the part. For this reason, we advise incorporating minimum channels of 0.7 mm for parts that require a shot peened finish. An alternative solution is to incorporate draft angles on any engraved text or surface details.
DYEING. 3DPRINTUK currently operates three Dyemansion DM 60 systems which provide an automated process for deep-dying of parts. This kit is effectively a large pressure cooker tailored to the demands of 3D printed polymer parts. The parts are dyed under pressure, which ensures that the dye penetrates deeper into the surface of the part (compared with soaking in a vat of dye) and results in a hard wearing and long-lasting colour.
Pros. Again, it is a relatively fast process. Large batches can be loaded into the machine with the selected dye, press a button and 2 and a bit hours later, the dyeing process is complete and requires no labour other than loading and unloading the parts. These automated systems are very clean and safe machines. The dye penetrates 0.25-0.5 mm into the surface of the part, which provides a longer lasting finish than paint. This means parts are less susceptible to chipping. Dyeing parts using this process is considerably cheaper than painting.
Cons. Dyed parts are generally not as smooth as a painted part, with the caveat that painting is generally preceded by sanding, filling, and priming the part (ie. a lot of manual work). If you spray paint a part with a natural finish, there is little to no visual difference to a dyed part. Outcomes with dyeing depend on which 3D printing process you use. At 3DPRINTUK both SLS and MJF parts can successfully be dyed black. However, we only dye SLS parts with colour. This is because SLS parts are white and result in strong vibrant colour dyed parts. MJF parts come off the machine grey and as a result are not as receptive to colour dye and result in muted colours. When dyeing parts black, MJF offers an advantage over SLS in that the internal parts are black, with a grey surface — if dyed black they are black all the way through. By comparison, white SLS parts that are dyed black are only black to 0.25 mm. This can be an issue for scratched and chipped parts. This post process incurs more expensive set up costs, and consumable costs are also an issue. Colour dye cartridges are expensive, so ROI requires higher volumes of parts for any given colour.
CHEMICAL SMOOTHING. Full disclosure, we are not offering this post process as a service at 3DPRINTUK — yet! We are currently testing it and can testify to the nature of this process and value of it. The process involves releasing chemical vapours within a controlled environment, which chemically melt the surface of the parts. The vapours are then fully evacuated and the chemical recovered. Vapour smoothing results in a high gloss finish that is close to injection moulding.
Pros. It is undoubtedly the glossiest finish of all and the closest finish to injection moulded parts. The smoothing part of the process is fully automated and safe. It is a relatively fast process in terms of the automation, with a cycle time of 40 minutes. Part strength is increased. This is because you are melting and re-forming the surface, which results in a more homogenous and stronger surface to the part. The surface becomes sealed and washable. Large batches can be completed in a single cycle.
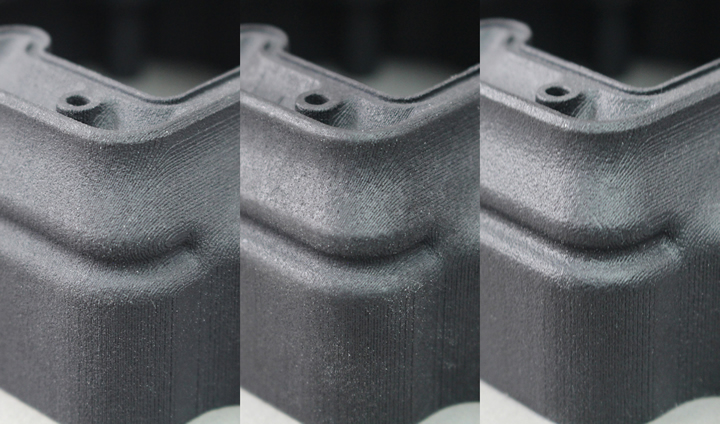
Cons. Despite being an automated process, there are (at least relative to the other processes above) quite a few man-hours required for vapour smoothing. This is because the vapour has to be able to completely surround every part. The only way to guarantee this is to hang all of the parts from a hook. This means that you have to either put hooks into the part or design hooks into the part for it to be hung from and then someone has to manually hang it. This is labour intensive and actually requires expertise in terms of understanding centre of gravity and primary surfaces etc. This finishing process can exaggerate any imperfections in the part – this can be a layer line or any minor imperfection from the build. Matte finishes do not show these. 99.9% of the time, this is not an issue — but the point here is that it can. Compared with other automated processes it is not as cost effective.
SUMMARY
For batch production, our advice is to manage your expectations when it comes to 3D printing and post processing your parts. We can — and have — demonstrated the value of our service. It has saved clients large amounts of money as a bridge between prototyping and injection moulding. With that said, it is important to understand the processes involved for 3D printing and post processing, along with the tolerances for variation. To reiterate, for 99.99% of parts we produce, the imperfections are minimal and do not affect the functionality of the parts for their intended application. Even with the highest end equipment available today it is really important to us that our customers understand the processes and the realities involved rather than being swept up by false claims of what is achievable.
Comments (0)
This post does not have any comments. Be the first to leave a comment below.
Featured Product