By now everyone knows what a Cobot is, but many aren't sure if they are ready, or if they are, how to successfully go about implementing into their day-to-day production processes.
 Successfully Implement a Cobot into your Operations: Step 1
Article from | Absolute Machine Tools
PART TWO of Article continued here
The last thing anyone wants to do is spend money for one, and when it arrives, move it off to the side or keep it packed up in the crate until you either forget it’s there, or your boss is asking you what you’re going to do with that hunk of metal no one is using.
Sound familiar? Well, that’s where Absolute Machine Tools comes in. Our A+ Automation Team can help you through this process to ensure success by walking you step-by-step through the process of implementation.
Step 1: The Cobot is Only One Part of the Application
Optimize your workspace
A cobot is only one component of the full automation cell. For the physical setup, consider where it will be located in the work area. Can you roll the cobot into the space where the employee formerly stood or must the work area first be redesigned?
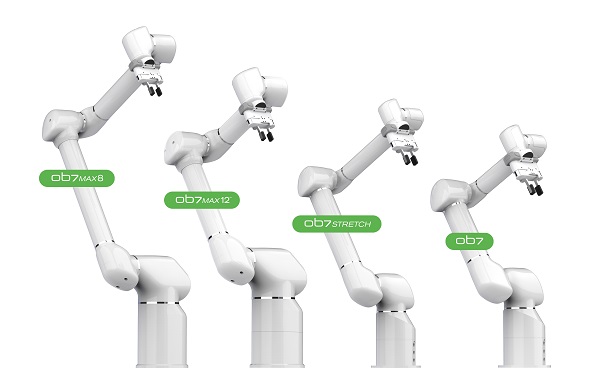
Once the cobot is in place, does it hamper the employee from accessing the area? This is common because work areas were designed for people with high flexibility and dexterity: much more so than a typical robot. Typical cobots (and industrial robots) have 6 joints, which makes them substantially less maneuverable than a human arm. Some cobots are now available with seven axes (or joints), which gives them maneuverability similar to a human arm. In general, more axes equals more flexibility and versatility.
Cobots with seven axes, like those pictured in this post, can fit into tighter spaces, reach around areas, and be located off to the side of the work area. Look for a model that won’t require the workspace to be redesigned to fit both the cobot and an employee. This is where Absolute Machine Tools’ A+ Automation can help. Allow our A+ Automation Team to come in and access the work area. Our automation engineers will review the area assessed, position of the cobot, and position of where the materials will be presented and off-loaded. Together we can help you determine if the work space needs some adjustments, or if things will operate well within the current configuration.
Communication is key when you implement a cobot in your operation
The next consideration in how to implement a cobot is communication between the robot and the equipment with which the robot will work. If the cobot will be tending a CNC or other machine, how will it interface with that machine? An older machine may not have interface capability or require a more complicated interface.
Consider these questions:
- Does your in-house engineer have the knowledge or expertise to configure that interface?
- Would it be easier to have the cobot push the start button like an employee does rather than interfacing electrically with the machine?
- If so, can the cobot reach the start button?
Again, this is where Absolute’s A+ Automation Team can help. With a few questions, we can determine the extent of the integration and if any other components, such as M-codes or special cables, are necessary to successfully integrate and interface with the CNC machine tool.
The content & opinions in this article are the author’s and do not necessarily represent the views of ManufacturingTomorrow
Featured Product